Is your vinyl window squeaking, sticking, or a workout to open? In most cases, the fix is simple, requires one key product, and takes less than 10 minutes.
This guide shows exactly what to use, where to apply it, and what to avoid—so your windows glide like new without creating a dirt‑attracting mess.
Quick Summary Box
- Time Required: 5–10 minutes per window
- Skill Level: Beginner
- Key Product: 100% silicone‑based spray lubricant
- Critical Rule: Always clean before you lubricate
Elevate your builds with custom UPVC/Vinyl windows
Get a Project EstimateWhat’s the Right Lubricant for Vinyl Windows (and What Should You Avoid)?
Use a 100% silicone spray or PTFE dry‑film lube. Avoid oils, greases, and graphite—they attract grime or stain vinyl.
The Best Lubricant for Vinyl Windows
A 100% silicone spray is the industry standard for vinyl and plastic components because it:
- Dries to a slick, water‑repellent film
- Doesn’t attract dust or dirt
- Won’t swell or degrade vinyl, nylon, or plastic parts
- Works in cold and humid conditions without gumming up
High‑quality PTFE (Teflon) dry‑film sprays are also compatible and provide a durable, low‑friction surface.
Lubricant Comparison Chart
| Lubricant Type | Use on Vinyl Windows? | Why or Why Not |
|---|---|---|
| 100% Silicone Spray | Yes (Recommended) | Dries quickly, repels water, won’t attract dirt. |
| PTFE‑Based Lubricant | Yes (Good Alternative) | Dry‑film, very slick, low residue. |
| Graphite Lubricant | No | Messy; can stain white vinyl and tracks. |
| Oil‑Based Sprays (e.g., standard WD‑40) | AVOID | Stays wet; attracts dust and forms sticky sludge. |
| Grease (e.g., lithium) | AVOID | Too heavy; gums up channels and holds debris. |
Related reading for product safety and cleaners: Can You Use Windex or WD‑40 on Vinyl Windows?
Where Exactly Should You Lubricate on a Vinyl Window?
Answer‑first: Target the moving channels and contact points—tracks, balance interfaces, and lock mechanisms—while keeping glazing, weatherstrips, and weep holes clean and dry.
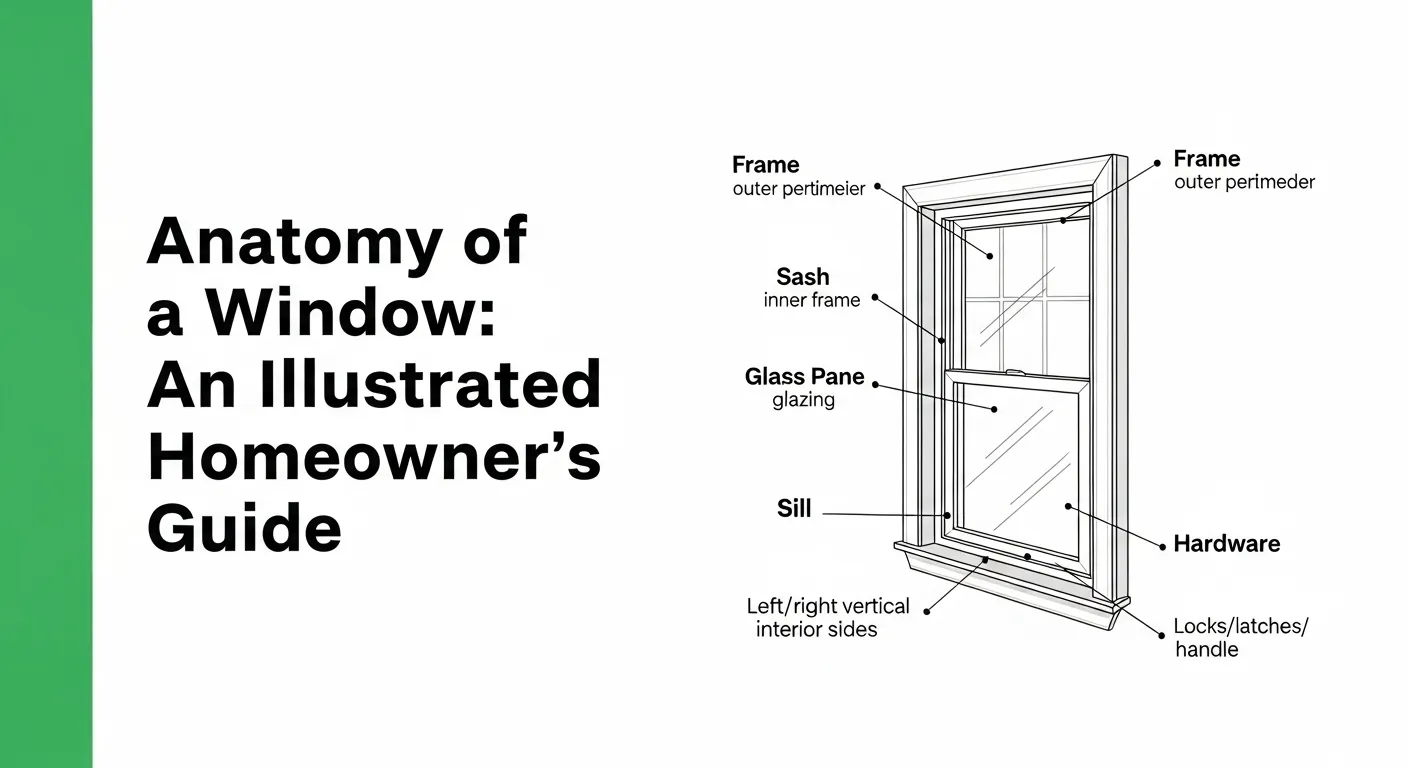
[Visual Aid suggestion: Labeled diagram for double‑hung and slider showing tracks, balance shoes, pivot bars, and lock points.]
For Double‑Hung & Single‑Hung Windows
- Jamb Channels/Tracks: The vertical grooves where sashes slide.
- Balance Shoes & Pivot Bars: The interface where the sash connects to the balance system—light silicone helps reduce squeaks.
If a double‑hung won’t stay up, that’s a balance failure—not a lubrication issue. See: How to Fix a Vinyl Window That Won’t Stay Up
For Sliding (Horizontal) Windows
- Sill Track: The lower horizontal track the sash rides on—most friction lives here.
- Top Track: The upper guide track—light application only.
For All Window Types
- Locks, Latches, and Hinges (casement/awning): A tiny shot on moving metal/plastic interfaces can quiet squeaks. Avoid overspray onto seals.
- Weatherstripping: Do not soak. A brief, light pass can reduce drag, but heavy lubricant on seals attracts dust.
Pro tip: If you see mold or heavy grime in tracks, treat first: How to Remove Mold and Mildew from Vinyl Window Frames
What Is the Fast 2‑Step Process to Make Windows Glide?
Answer‑first: Clean first, then apply a light, precise silicone coat and operate the sash to spread it evenly.
Phase 1: Deep Cleaning (Do Not Skip)
- Open the window fully.
- Brush and vacuum tracks, corners, and weep slots to remove grit and bugs.
- Wipe tracks with a cloth dampened in mild detergent or isopropyl alcohol to cut oils.
- Dry completely with a clean cloth—lubricant won’t adhere to wet residue.
Phase 2: Lubrication
- Attach the straw to your silicone spray for accuracy.
- Apply a light, even spray:
- Double‑hung: down the jamb channels; small burst at each balance shoe/pivot interface.
- Slider: along the sill track and light pass on the top guide.
- Open/close the window 5–6 times to distribute the film.
- Wipe any overspray off vinyl and glass with a clean, dry cloth.
Avoid flooding: more isn’t better. Excess lubricant attracts dust and can drip onto walls or floors.
How Often Should You Lubricate Vinyl Windows?
Answer‑first: Once a year for high‑use windows; every 18–24 months for low‑use rooms.
- Best timing: Spring—after cleaning out winter grit and before peak ventilation season.
- Bonus: Combine with a quick track vacuum and a check of weep holes for clear drainage.
If you’re in the middle of a renovation or new set, see install guides:
- Installation: How to Install Replacement Vinyl Windows
- Installation: How to Install uPVC Windows
- Tips: How to Install a Vinyl Window Without a Nailing Flange
Troubleshooting: What If the Window Still Sticks?
Answer‑first: Lubrication fixes friction, not structural or mechanical issues. Inspect for obstructions, paint, and hardware problems.
- Check for debris or damage: Pebbles, screws, or warped track liners can bind the sash. Remove obstructions; replace damaged liners.
- Inspect balances (double‑hung): If the sash drops or won’t stay up, a balance is likely broken or detached—repair/replace rather than lubricate. See: How to Fix a Vinyl Window That Won’t Stay Up
- Painted shut: Carefully score paint lines with a sharp utility knife along the sash/stop seam to free the sash.
- Cracked frame: Lubricant won’t help a structural defect—review: How to Repair a Cracked Vinyl Window Frame
Custom vinyl windows, tailored to your home. Boost comfort and curb appeal with the sizes, colors, and glass you choose.
Customize NowConclusion
The formula is simple: clean thoroughly, apply a light coat of 100% silicone (or PTFE) exactly where the sash rides, and wipe the excess. This 10‑minute maintenance extends hardware life, prevents wear, and makes every open/close feel effortless.
Considering other window upgrades and ROI? Read: Do Vinyl Windows Increase Home Value? and budgeting guides in The Complete Guide to Vinyl Window Costs & Pricing