Installing window trim is one of the most impactful DIY projects you can do—instant character, cleaner lines, and real value in a single weekend.
This guide gives you clear, step-by-step instructions for the three most popular trim styles, with pro tips for tight joints and a flawless finish—even on your first try.
Which Trim Style Should You Install?
Pick the method that matches your design and skill level. Traditional is classic, Craftsman is forgiving and strong, and Modern is sleek but miter‑critical.
- Traditional (Stool & Apron)—Timeless, built‑up look with the most parts
- Craftsman (Butt Joints & Header)—Clean, substantial, easier than mitering
- Modern (Picture Frame with Miters)—Simple lines, requires precise miters
Jump to a method:
- Method 1: Traditional (Stool & Apron)
- Method 2: Craftsman (Butt Joints)
- Method 3: Modern Picture Frame (Miter Joints)
Related: See style options in our overview of window trim types.
What Do You Need Before You Begin? (Tools, Materials, and the Golden Rule)
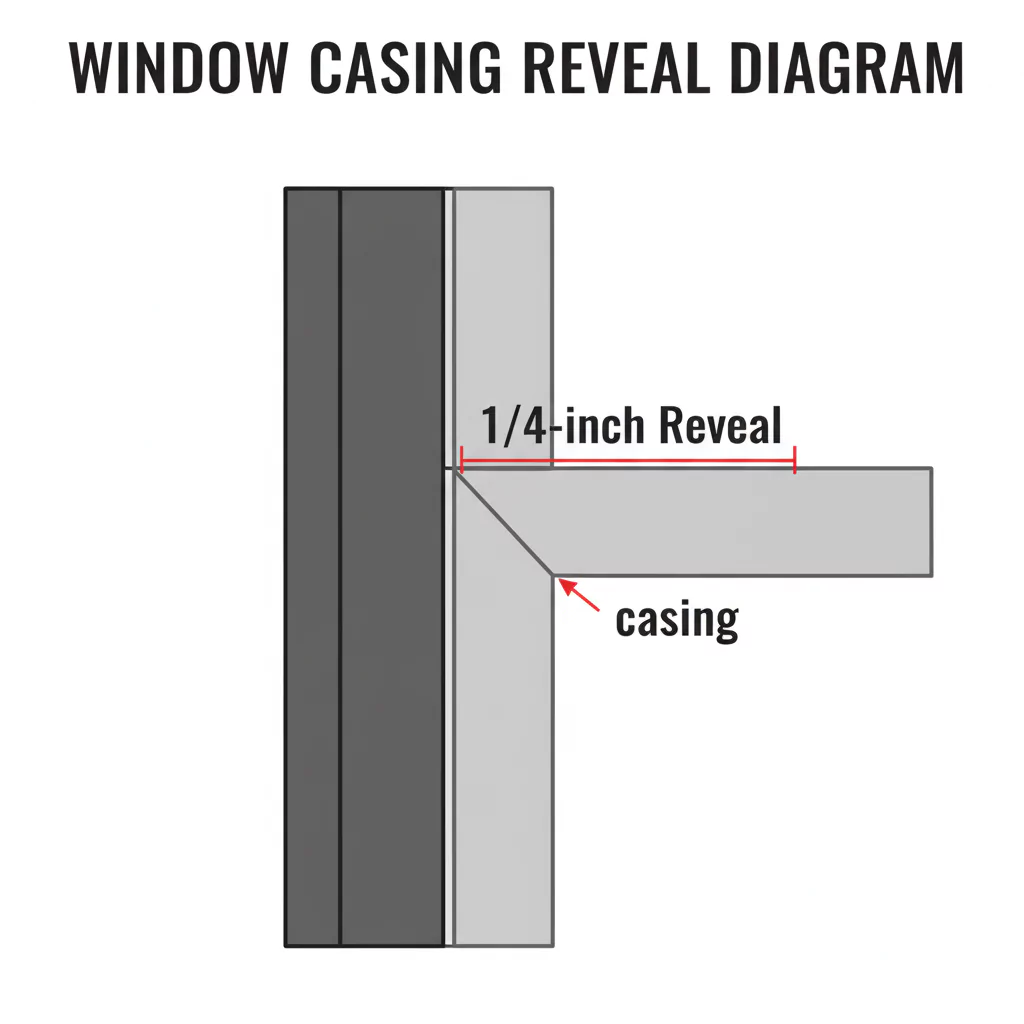
Gather cutting/fastening tools, quality trim, and adhesives; then mark a consistent 1/4 in reveal around the jamb—this shadow line hides imperfections and guides every cut.
Tools & Materials Checklist
- Essentials
- Miter saw
- Tape measure
- 18‑gauge brad nailer (+ air or battery)
- 2 ft and/or 4 ft level
- Combination square
- Pencil, painter’s tape
- Materials
- Trim/moulding (casing, head components, stool, apron as required)
- Wood glue
- 2 in 18‑ga brad nails (and a few 2.5 in for heads)
- Wood putty (stain‑grade) or high‑quality spackle (paint‑grade)
- Paintable caulk
- 220‑grit sandpaper; sanding block
- Shim stock (for out‑of‑plumb walls)
- Optional but pro‑grade
- Digital angle finder or bevel gauge
- Scribe compass
- Nail set
- Laser level

What Is the “Reveal,” and Why Does It Matter?
- The reveal is the intentional setback—typically 1/4 in (≈ 6 mm)—from the inside edge of the window jamb to the edge of your casing.
- It creates a clean shadow line, hides slight jamb inconsistencies, and provides a consistent reference for measuring and cutting.
How to mark a perfect reveal:
- Set your combination square to 1/4 in, then strike light pencil lines along both side jambs and the head jamb.
- Mark short dash lines at intervals; don’t over-darken (you’ll erase or paint later).

Method 1: Installing Traditional Trim (Stool & Apron)
First, install the stool, followed by the side casing aligned with the reveal, then the head casing; finally, attach the apron below the stool.
- Measure and cut the stool
- Measure the interior width from jamb to jamb.
- Add horn overhangs: typically +1 to +1.5 in on each side (2–3 in total) for visible “horns” beyond the side casings.
- Rip to depth if needed so the stool projects 1–2 in into the room.
- Dry-fit against the sill; scribe and notch around jambs if necessary.
- Install the stool
- Apply wood glue to the sill; set the stool in place.
- Ensure that it’s level front‑to‑back and side‑to‑side; shim where needed.
- Fasten down into framing with countersunk finish screws near the back edge (concealed later by the apron) or 15/16‑ga nails if available.
- Mark the reveals
- Use the combination square to mark a consistent 1/4 in reveal on both side jambs and the head jamb.
- Measure and cut side casings
- Measure from the stool’s top (at the reveal line) to the head reveal line.
- Cut square ends (90°) for both side casings.
- Install side casings
- Apply a thin bead of wood glue to the back (avoid squeezing out the edges).
- Align to the reveal lines; nail 2 in 18‑ga brads every 10–12 in, alternating near inside and outside edges. Verify the plumb with a level.
- Measure, cut, and install the head casing
- Measure “in‑place” across the side casings to ensure exact length.
- Cut square ends. Slightly back‑bevel the ends (1°) for tighter face seams.
- Glue and nail across the head into studs/headers (use a few 2.5 in brads as needed).
- Measure, cut, and install the apron
- Measure from horn to horn beneath the stool, then cut it to length, which often aligns with the outer edges of the side casings.
- Glue and nail the apron to the wall beneath the stool; ensure it is level.
- Pro Tip: Use wood glue on every joint before nailing for maximum strength and cleaner seams.
- Pro Tip: Clamp where possible (or use painter’s tape as a soft clamp) until glue sets.


Method 2: Installing Craftsman-Style Trim (Butt Joints)
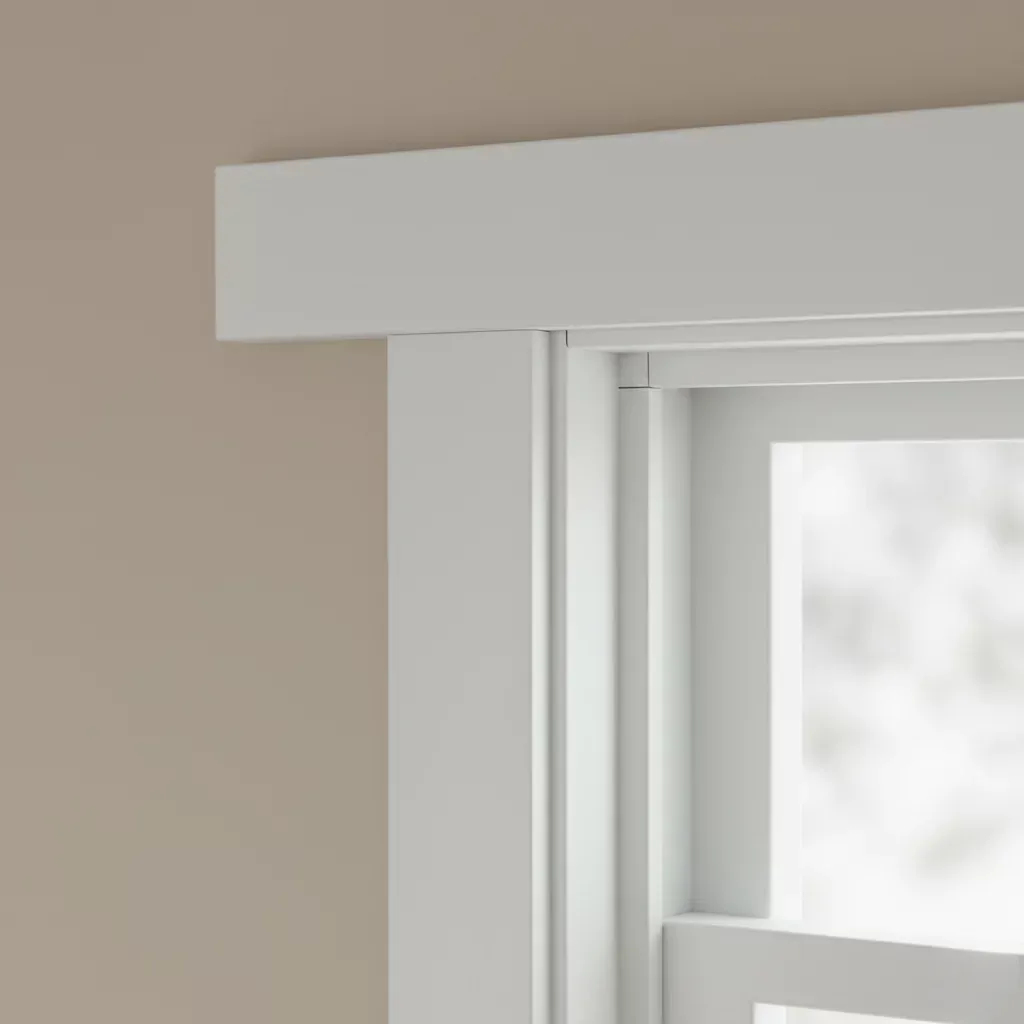
Craftsman trim uses flat stock and square butt joints—no miters. Install side casings first, then a wider head casing that overhangs the sides.
- Mark the reveals
- Strike the 1/4 in reveal on both side jambs and the head jamb.
- Measure and cut the side casings (straight cuts)
- Measure from stool (or sill) to head reveal; cut both sides square.
- Install the side casings
- Glue lightly; align to reveal; nail 18‑ga every 10–12 in. Check plumb.
- Measure and cut the head casing (header)
- Determine desired overhang (commonly 1/2–3/4 in per side).
- Cut the head to length to create equal overhangs past the side casings.
- Install the head casing
- Center the head casing over the window; verify level; glue and nail.
- Optional build‑up: Add a thin cap board above and a small reveal strip below for depth and shadow lines.
- Optional: Add stool and apron
- For a fuller look, include a simple rectangular stool and matching apron as in the Traditional method.
- Pro Tip: A 1–2 mm back‑bevel on butt ends reduces visible gaps on slightly out‑of‑square walls.
- Pro Tip: Use a 1/8 in reveal strip under the head casing to create a crisp shadow line without complex profiles.

Method 3: Installing Modern Picture-Frame Trim (Miter Joints)
Picture‑frame trim uses four pieces with 45° miters. Accuracy matters—measure off installed pieces and test‑fit every corner.
- Mark the reveals
- Ensure a consistent 1/4 inch reveal on both sides and at the top edge.
- Measure and cut the first side (45° miter)
- Cut a 45° miter at the top end; leave the bottom square (or miter if fully framed).
- Hold to reveal and mark exact bottom length; finish cut to fit.
- Install the first piece
- Glue sparingly; nail in place, checking plumb. This becomes your reference edge.
- Measure and cut the top piece (two 45° miters)
- With one side installed, hold the top trim in place, and mark both miters by scribing against the side piece.
- Cut, test-fit, and adjust with whisper cuts (1/64 in) for a tight seam.
- Continue around the window
- Install the remaining side and bottom similarly, measuring off installed pieces.
- If walls aren’t square, measure the actual angle with a digital gauge and split the angle across both miters (e.g., for 92°, cut two 46° miters).
- Pro Tip: Lightly back‑cut miters (1–2°) so faces close perfectly.
- Pro Tip: Blue tape the miter joint as a clamp during nailing to keep faces flush.

How Do You Finish Trim Like a Pro?
Sink nails, fill appropriately for stain/paint, caulk edges sparingly, and sand smooth before finishing.
- Set the nails
- Use a nail set to drive all brads just below the wood surface.
- Fill the holes
- Stain‑grade: Use color‑matched wood putty or gel filler; fill after staining if recommended by the manufacturer.
- Paint‑grade: Use high‑quality spackle; slightly proud; sand flush when dry.
- Caulk the edges
- Apply a thin bead of paintable caulk where trim meets wall and where casing meets jamb; tool lightly with a damp finger.
- Do not caulk miter seams excessively—thin is better to avoid shrink‑lines.
- Final sanding
- Lightly sand fills and edges with 220‑grit; remove dust; then prime/paint or stain/clear‑coat per product guidance.
- Pro Tip: For the crispest paint lines, caulk, prime, then apply two thin finish coats, sanding lightly between.
How Do You Fix Common Trim Problems?
Gaps usually come from out‑of‑square openings or wavy walls—measure the true angles, scribe where needed, and finish with appropriate fillers.
- Problem: There’s a gap in my mitered corner
- Solution: If small, fill with wood putty (stain) or caulk (paint). If large, your angle is off—measure the true angle with a bevel gauge and re‑cut, splitting the angle across both pieces.
- Problem: My walls are wavy and the trim doesn’t sit flat
- Solution: Use flexible, paintable caulk for minor gaps. For larger gaps, scribe the casing to the wall: hold in place, run a scribe compass set to the widest gap, mark, then plane/sand to the line.
- Problem: My window is not square
- Solution: Don’t assume 90°. Install side casings first and make them perfectly plumb. Then measure the exact opening for the head and bottom, cutting to fit those real dimensions.
- Problem: Long head casing is bowing
- Solution: Add a hidden screw into the framing at the bow’s apex; countersink and fill. Ensure material is straight before install; acclimate trim to room humidity.
- Problem: Nail blowouts at edges
- Solution: Angle nails slightly toward the thicker material; keep fasteners 3/8–1/2 in from edges; reduce air pressure on narrow stock.
Conclusion
Success comes from three habits: choose the right style for the room, mark a consistent 1/4 in reveal, and measure off installed pieces for reality‑based cuts. With patience and these pro workflows, your trim will transform the room’s look and feel.
Planning more exterior upgrades? Learn to attach shutters properly in How to Install Shutters on a House with Vinyl Siding. New window project ahead? Start with How to Install Vinyl Windows and size selection in Standard Window Size and Single-Hung Window Sizes.


